
How to Create Luxurious Bath Bombs at Home
Updated: Aug 19
Creating your own bath bombs at home can be a delightful and rewarding experience. Not only do they add a touch of luxury to your bathing routine, but they also allow you to customize scents, colors, and ingredients to suit your preferences. In this guide, we will walk you through the process of making luxurious bath bombs that will transform your bath into a spa-like retreat.
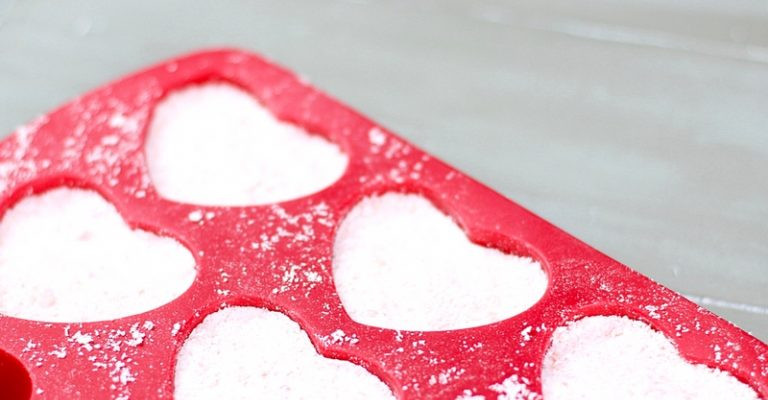
Miniature heart bath bombs
Understanding Bath Bombs
Before diving into the creation process, it's essential to understand what bath bombs are and what makes them special. Bath bombs are effervescent balls made from a mixture of baking soda, citric acid, and other ingredients that dissolve in water, releasing fragrance, colour, and skin-nourishing properties.
Key Ingredients
Baking Soda: The primary ingredient that creates the fizzing effect when it comes into contact with water.
Citric Acid: Works with baking soda to produce the effervescent reaction.
Potato Starch: Works to slow down and prolong the effervescent reaction.
Essential Oils: Provide fragrance and therapeutic benefits. Popular choices include lavender, eucalyptus, and citrus oils.
Colourants: Natural water soluble dyes can be added to create visually appealing bath bombs.
Essential Tools and Equipment
To make bath bombs, you will need some basic tools and equipment:
Mixing bowls
Whisk or spoon
Bath bomb molds (silicone and 3D printed molds work well)
Measuring cups and spoons
Spray bottle (for moisture)
Gloves (to keep your hands clean and protected from iritation from the citric acid)
Step-by-Step Guide to Making Bath Bombs
Step 1: Gather Your Ingredients
Start by gathering all your ingredients and tools. Here’s a simple recipe to get you started:
1 cup baking soda
1/2 cup citric acid
1/2 cup potato or corn starch
1 tablespoon carrier oil (almond, apricot, jojoba or coconut)
35-40 sprays of witch hazel distillate or water (2.5 tablespoons)
20-30 drops of your favourite essential oil or blend
Optional: Colourants, dried flowers, epsom salts
Step 2: Mix Dry Ingredients
In a large mixing bowl, combine the baking soda, citric acid, and Epsom salt. Use a whisk or gloved hands to break up any clumps and ensure everything is evenly mixed. This is also the optimum time to add a dry colourant.
Step 3: Mix and Add Essential Oils and Carrier
In a separate small bowl, mix the essential oils with a carrier oil. Slowly add this mixture to the dry ingredients, stirring continuously. The goal is to avoid activating the fizzing reaction too early.
Step 4: Moisten the Mixture
Using a spray bottle, lightly mist the mixture with water while stirring. If you are using liquid colour, add it as you are adding the moisture. You want the mixture to hold together when squeezed in your hand but not be too wet. Be cautious not to add too much moisture at once.
Step 5: Pack the Mixture into Molds
Once your mixture is ready, pack it tightly into your bath bomb molds. Press down firmly to ensure they hold their shape. If you’re using two-part molds, overfill each half slightly before pressing them together.
Step 6: Let Them Dry
Allow the bath bombs to dry for at least 24 hours. Once they are completely dry, gently remove them from the molds. If they crumble, they may need more time to dry.
Step 7: Store or Use
Store your bath bombs in an airtight container until you’re ready to use them. When you’re ready for a luxurious bath, simply drop one into warm water and enjoy the fizzing, fragrant experience.
Customizing Your Bath Bombs
One of the best parts about making bath bombs at home is the ability to customize them. Here are some ideas to make your bath bombs uniquely yours:
Scent Combinations
Experiment with different essential oil blends. For example:
Relaxing Blend: Lavender and chamomile
Energizing Blend: Lemon and peppermint
Soothing Blend: Eucalyptus and tea tree
Colour Variations
Use natural colourants like beetroot powder for pink, spirulina for green, or turmeric for yellow. You can also layer colors for a more visually appealing effect.
Add-Ins
Consider adding dried flowers, herbs, or even biodegradable glitter for an extra touch. Just be mindful that some add-ins may clog your drain, so choose wisely.
Benefits of Using Bath Bombs
Bath bombs offer numerous benefits beyond just a pleasant bath experience. Here are some reasons to indulge in your homemade creations:
Relaxation: The combination of warm water and soothing scents helps to relieve stress and promote relaxation.
Skin Nourishment: Ingredients like apricot oil and essential oils can benefit your skin, leaving it feeling soft and hydrated.
Aromatherapy: The scents from essential oils can uplift your mood and create a calming atmosphere.
Troubleshooting Common Issues
While making bath bombs is generally straightforward, you may encounter some issues. Here are a few common problems and their solutions:
Bath Bombs Crumble
If your bath bombs crumble when removed from the molds, they may have been too dry. Ensure you mist the mixture adequately during the preparation process.
No Fizzing Action
If your bath bombs do not fizz when placed in water, they may have been exposed to moisture before use. Store them in a cool, dry place to maintain their effervescent properties.
Colour Bleeding
If your bath bombs bleed color in the water, you may have used too much colorant. Start with a small amount and gradually increase until you achieve the desired hue.
Conclusion
Making luxurious bath bombs at home is not only a fun and creative activity but also a way to enhance your self-care routine. With just a few simple ingredients and some creativity, you can create beautiful, fragrant bath bombs that will elevate your bathing experience. So gather your supplies, experiment with different scents and colors, and enjoy the soothing benefits of your homemade bath bombs.
Now that you know how to create these delightful treats, why not give it a try? Your next bath could be just a few steps away from becoming a spa-like retreat.
P.S. Keep an ear or eye out for a local workshop on bath bomb making!
Comments